woodworking bread box
As hard as it is for me to believe, its time for another birthday present for my boy. He loves to draw, so I decided on making a box to hold all his pencils, crayons etc.
Now normally my posts start from the beginning and follow the creation process through to the product. This ones going to be different - mostly because as the time crunch came on, the picture taking pretty much stopped.
So here it is, a bit backwards, but hopefully still worthwhile.
The completed box:


 And now for what I have in choice of "step-by-step" photographs.
The beginning:
 The middle:
 The end (assuming that you understand that by "end" I mean end of the beginning):
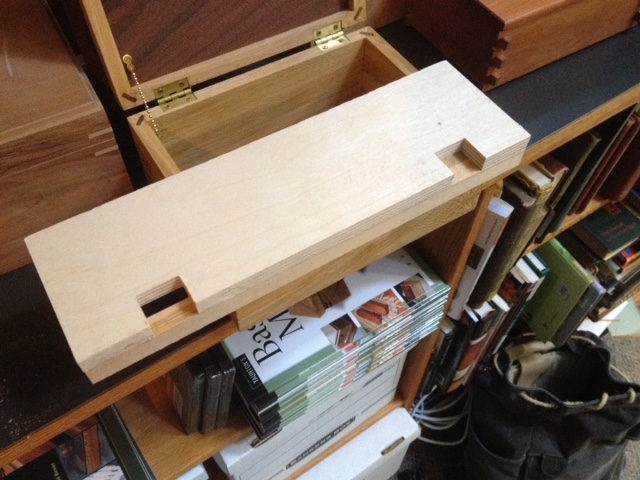
 And pictures of two tips or techniques that Ive found useful for making this style of box (which is really just a giant version of my pencil box):
The first involves shortening one end section to allow the top to slide in and out of the grooves. I rip down the center of the groove and then plane the remaining waste down to the bottom of the groove (well, "bottom" when the piece is oriented as it is in the finished box). It is easy to go too far, and then the lid does not fit snug; there is a gap between it and the end of the box. My improved technique is to first take a pencil and draw a line down the back corner of the remaining groove. As soon as this planes off, I stop. Pretty simple, but pretty darn effective. Why did it take me so long to think of that?
 The second is a simple choice to test the fit of the rabbeted bottom (or top) into the grooves in the box sides. I just grab an offcut of the grooved stock and use that as a handy gauge to test the rabbets. Again, simple but effective, and embarrassingly slow to come to me.
 I guess I better start planning next years birthday present, as it will be here before I know it!
Do you find information about woodworking bread box are you looking for? If not, below may help you find more information about the woodworking bread box. Thank you for visiting, have a nice day.
About torer
Author Description here.. Nulla sagittis convallis. Curabitur consequat. Quisque metus enim, venenatis fermentum, mollis in, porta et, nibh. Duis vulputate elit in elit. Mauris dictum libero id justo.

